

Point Cloud Processing
Introduction to the Point Cloud:
Since the Introduction of the Point Cloud Processing Feature from Surpac Version 6.8, the Ability to Process Points Directly from Photogrammetry Software is very easy. This Allows Surveyors to more Quickly and Accurately find Volume Calculations depending on your Hardware Requirements. I.E Graphics Card etc.
Many Mining Companies now are using LIDAR Technology to capture Points, these Points can then be processed in Surpac from a .las File, using around a 4GB Graphics Card. Around 150 Million Points can be Processed with this Hardware.
TIP: ‘Surpac Tutorial on Faster Meshing Point Clouds Here’.
It is a Good Idea to also set the Point Cloud Resolution to 10,000,000 Points prior to Processing. This will ensure that a Dense Cloud Appears Less Sparse.
To do this, select; CUSTOMISE >> DEFAULT PREFERENCES >> GRAPHICS >> POINT CLOUD RESOLUTION.
Image 1. Shows the Option to Change the Point Cloud Resolution:
Exporting From Photogrammetry Software:
In order to Process the Point Cloud in Surpac, it must first be Exported Correctly from the Photogrammetry Software Program.
This Example shows how this is done using Agisoft, and the Correct Output File we will be using is a .asc File.
Assuming we have now Finished Processing our Dense Cloud; the next Step in Agisoft is to Select: FILE >> EXPORT >> POINTS.——-
Select the Location where you would like the File to be Located. (In this Example we will select our Surpac Job File.
Then, we must put the Suffix, ‘.asc’, after it. Then Select ASCII .pts type, and press Save.
TIP: ‘Click Here to Learn in Detail About .ASCII Files’.
The Next important Step is to select a LOCAL Coordinate System. This is important because, if the File is Exported as a WGS Coordinate System, then it will not process correctly.
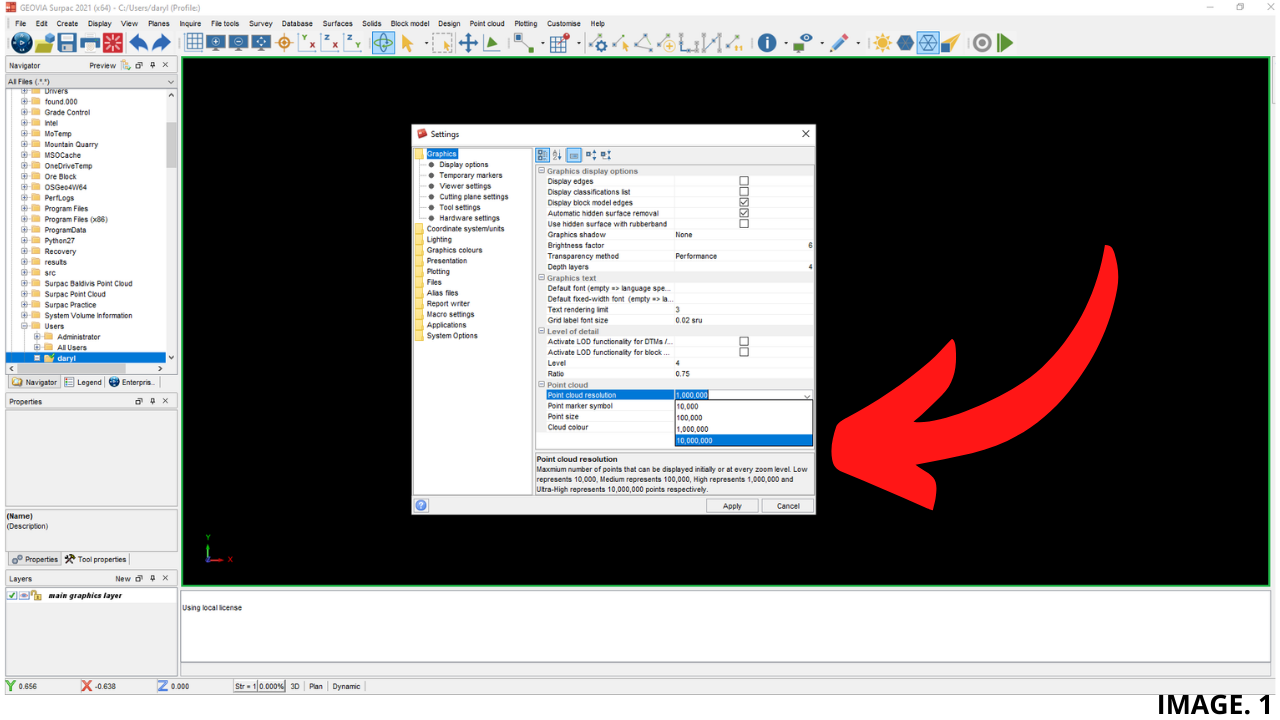
Once the File has been Exported, there is sometimes a Bug which needs Fixing; this is the First Line of Text in the .asc File, which needs to be deleted.
Do this by selecting the File and opening as a Text File.
Image 2. Shows the First Line of Text in the .asc File which needs deleting:
DTM over a Point Cloud In Surpac:
Now the Point Cloud File is ready to be Processed in Surpac. Locate the .asc File and drag it into your Main Graphics Layer. (This may take some time to Appear, depending on the Amount of Points in the Cloud).
You will know the Cloud has been created Correctly by Rotating to Visually Inspect your Points. You can also now interrogate and interact with each Point. And you can also use the Point Cloud Cleaner to remove any Erroneous Points.
TIP: ‘Click to Look into More Detail on How to Create DTMs Over a Point Cloud in Surpac’.
Now, we will show the Process of creating a Detailed DTM Model over the Point Cloud for Volume Calculation Purposes.
So, creating a DTM over a Point Cloud is a different Process in Surpac 2021 as there are some New Options, and the Traditional Method of DTM creation do not work.
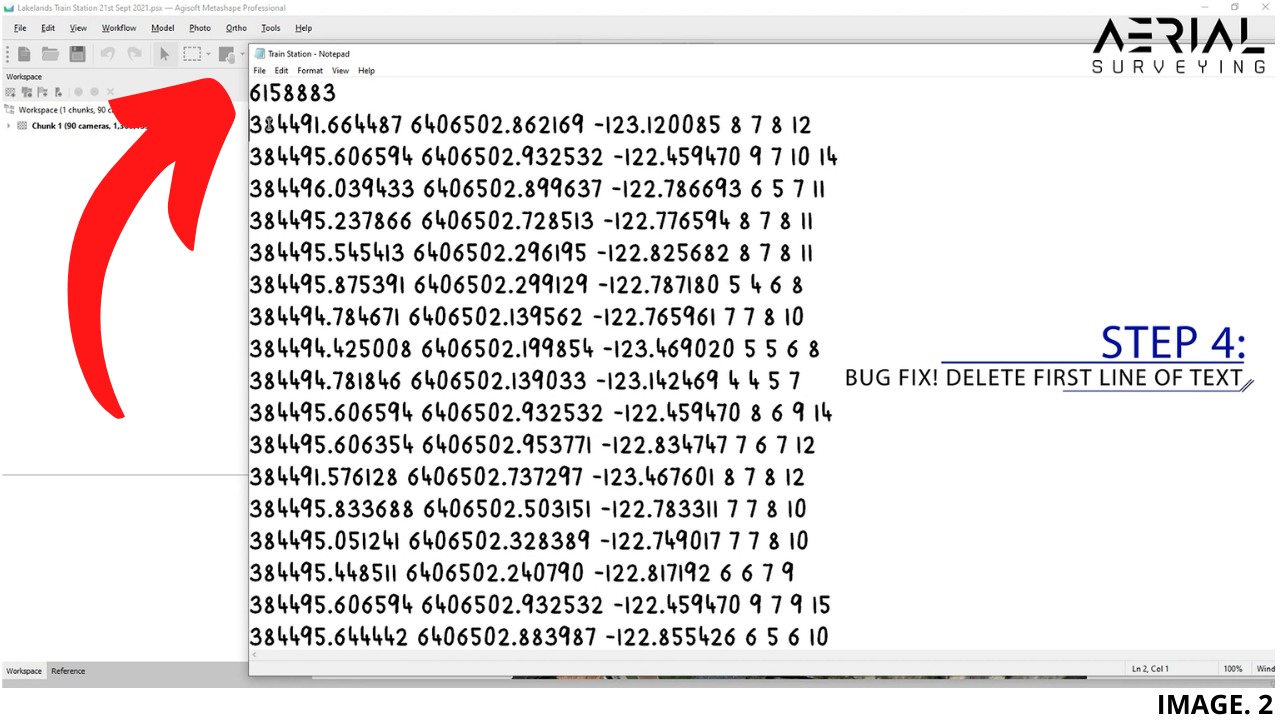
Once ready to create the DTM, it is Good Practice to Trim your Targeted area first, because creating a DTM over more than 1,000,000 Points will take much longer time.
Image 3. Shows the warning in Surpac that appears if trying to DTM over too many Points:

Trimming Your Point Cloud:
To Trim your Point Cloud; Select SURFACES >> MESH TOOLS >> POINT CLOUD EDIT
In this next Panel, under Edit Area, choose ‘DIGITISE A POLYGON’. Select Apply.
This Allows you to now Trim the Point Cloud. (This is not possible using the Traditional Method of Clipping/Trimming).
Next, to create the DTM, Select; POINT CLOUD >> CREATE SURFACE >> APPLY.
Your new DTM will be Generated. This must then be saved as a DTM File.
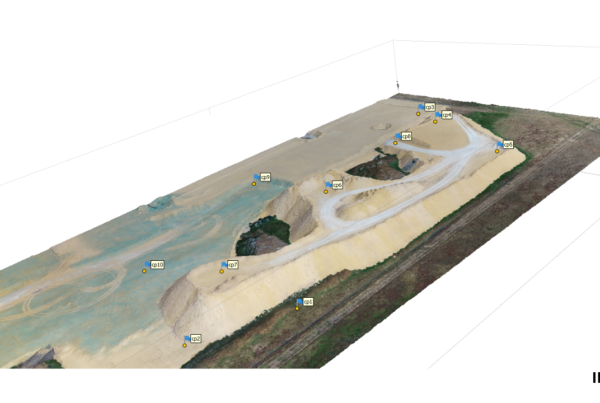
Image 4. Shows the Newly Created Point Cloud DTM:
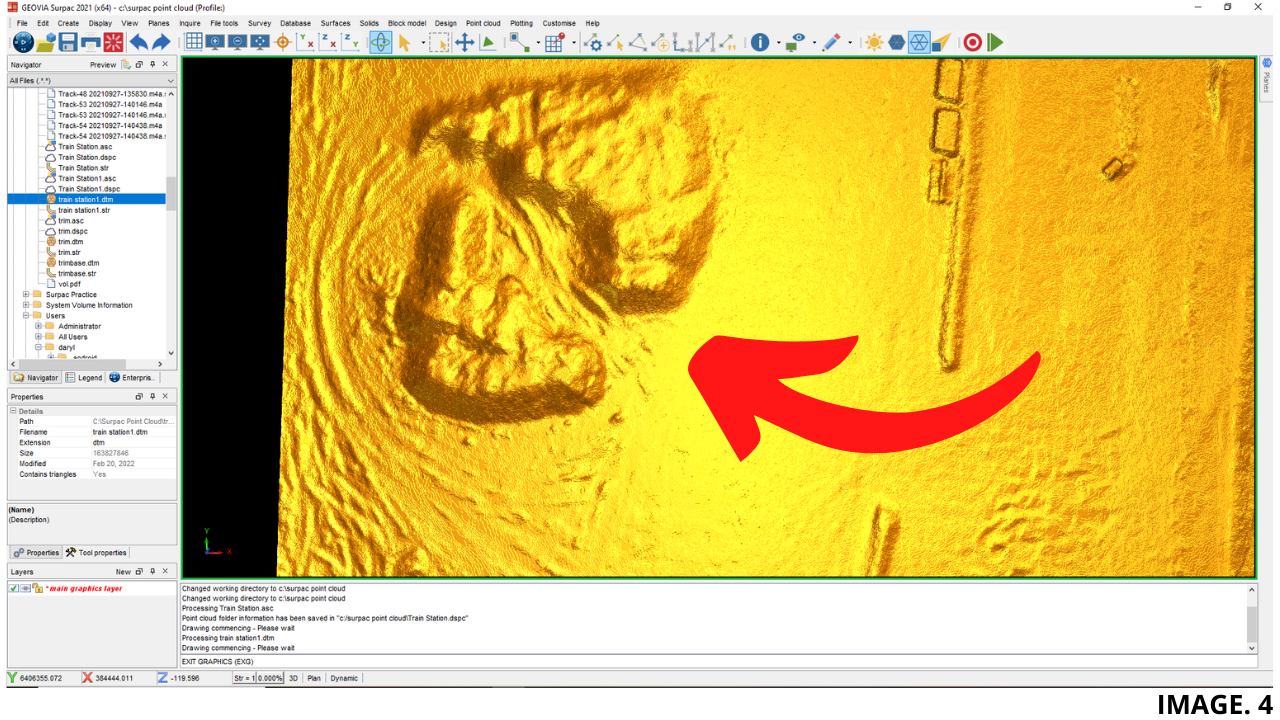
As you can see the Triangulations from the Point Cloud DTM is much more Detailed than using the Original String DTMs. Volumes created using this Method are much more Accurate and thus much more Economical.
TIP: ‘Click Here to See More Detail About Volume Calculation’.


Recent Comments